Corset Fit 101
A well-made corset has a very carefully balanced fit: to create a beautiful shape that is actually wearable by a human requires great attention to the distribution of ease and negative ease. The lacing and lacing gap allows for fine-tuning of the fit on an individual basis without requiring a fully bespoke corset. Much has been written about bra fit, but what defines fit for a corset?
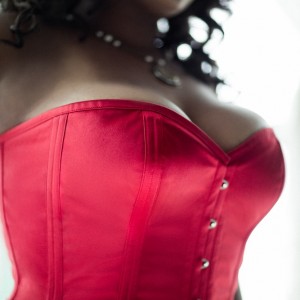
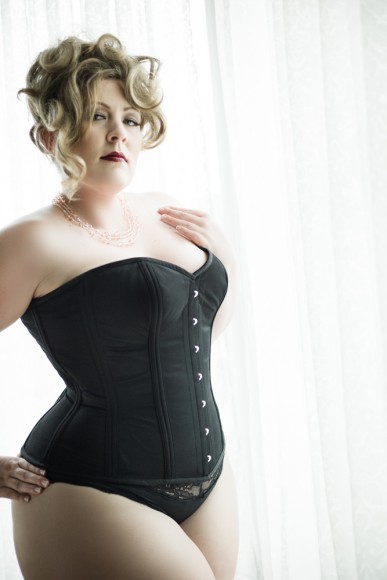
Pop Antique Vixen ribbon corset | Model: Nicole Simone | Photo © Max Johnson
As a corsetmaker, I firmly believe that one never stops learning about fit. There are always new ways to address the uniqueness of each body or to make a standard fit style with greater comfort. There's also a relationship between fit and construction, and each wearer and maker will have their own opinions and preferences. With all that in mind, I'd like to start with some basics, focusing on what fit looks like in a corset. This is the method of fit analysis I use when working for my corsetry mentor, Dark Garden, who has the benefit of essentially a full run of basic corsets in every style and size combination for fitting, and when fitting models for my own line Pop Antique, where I use my smaller library of existing samples.
Placement of the corset
In my article on lacing mistakes, I discussed how important it is to make sure the corset is properly anchored on the skeletal waistline. You'll want the corset to be settled just between the bottom of your rib cage and the top of your pelvis for maximum compression and comfort. It may migrate (usually up) as you lace in or throughout the course of the day, so you might give a little tug at the top or bottom of center front to adjust it back into position.
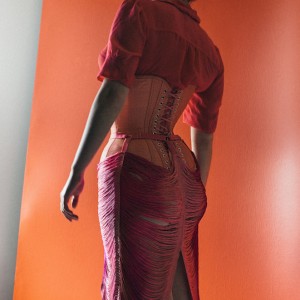
Pop Antique Bombshell corset | Model: Olivia Campbell | Photo © Marianne Faulkner
Top of corset: bust or underbust
The top of the corset should lay snugly against the body. It should be tightened such that it neither gaps (stands away from the body) nor cuts in (creating a muffin effect). Particularly at the side of the rib cage (or top of the bust) you want to make sure that it is laying smooth and flush. With a plus size figure, sometimes the underbust may look flush, but as there is more compressible flesh, the ribs can be tightened more. Even so, try to avoid over-tightening (at any size) as it will create a roll at the back of the corset. Tightening the underbust properly will further emphasize the waist and hipline, rather than eclipsing it. If a corset cuts in at the back but is gapping at the sides, it may have the right circumference but be the wrong shape for your body and posture. This can always be covered with a bolero if you're not in a position to have the fit at least partially personalized for your body.
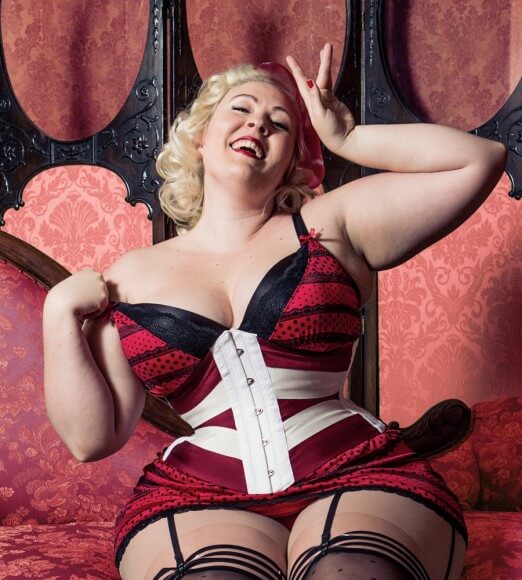
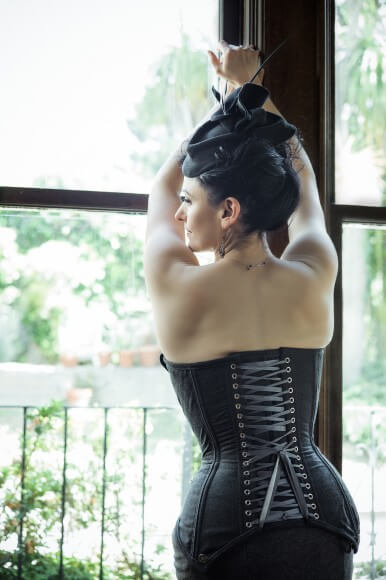
Dark Garden Valentine overbust corset | Model: Nicole Simone | Photo © Joel Aron
Waist
Corsets are cut with negative ease at the waist: they are smaller than the body they go onto. Thus, the lacing has to be adjusted each time the corset is put on or taken off. Stretch garments also have negative ease, but the stretch is what allows you to put them on without fiddling with a closure. The give in a corset comes from the lacing. If the lacing has stretch, it won't work, and if the corset is loose enough to come off immediately, it is too big! Boning and waist reduction should be spaced as to avoid creating pressure points. Size-wize, everyone compresses differently and each brand allows for varying degrees of reduction. For a starting reduction, look for a shapely corset that is 4-6" smaller than their natural waist, to be worn with roughly a 2" lacing gap. If you're looking for more dramatic shaping and compression, you can use the guideline of a 15% reduction, minus your lacing gap. Corset sizes from about 30" can wear a lacing gap up to 4" wide. Of course, you should always check in with your corsetiere of choice, but this gives you a starting point! (Note that these numbers won't apply with budget corsetry, which often is cut with a tube-like shape... less shapely than your body might already be, uncorseted.) If you have the opportunity to try on a corset before buying, hang out in it for as long as is reasonable. Your body may settle within the first 15 minutes, but as a day wears on it could reverse course into discomfort.
Dollymop for Dark Garden Cavalry corset | Model: Autumn Adamme | Photo © Joel Aron
Bottom of corset: hips
Another of the lacing mistakes I mentioned earlier is over-lacing the hips. I like to fit people with the corset once again visually flush against their body, but this time with enough room to get a couple fingers inside the bottom edge. This allows the hips to expand when you walk and sit down. Of course, some people prefer the feeling of additional compression around their hips, even if it results in a visually too-tight corset, and that's perfectly acceptable, too. As a starting point, though, I like to start with a smooth line.
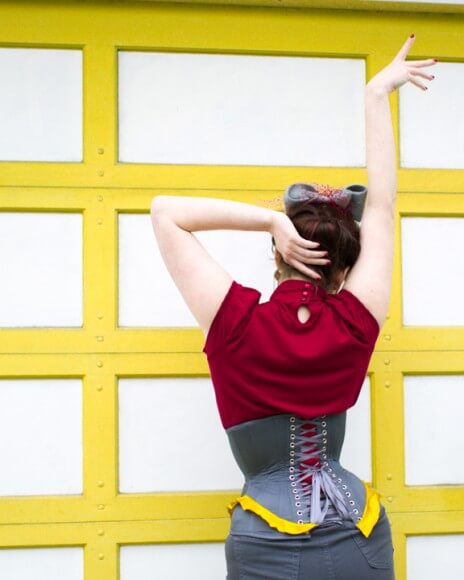
Pop Antique Demoiselle underbust corset | Model: Victoria Dagger | Photo © Alyxander Ryan
The lacing gap
The lacing gap is critical to the fit of a corset. Whether or not you prefer to lace your corsets fully closed or leave a gap is a personal choice. A small historic study did show that a lacing gap averaging 2" was standard in the Victorian corset-wearing heyday. Some find the pressure of boning along the spine to be excessive while others find it supportive. Having a gap at the center back, in my experience, allows for the center back line of the corset to lay smoothly more easily, as well as allowing for greater variance in the degree of reduction and any size fluctuation. It's a common fallacy that the shape of the gap must be absolutely parallel: a variance of up to 2" total is perfectly fine if necessary to create a good fit. (For example, 1" at the ribs, 2" at the waist, 3" at the hips.) It's far more important for the hips and ribs to lay flush with comfortable pressure at the waist than to create a parallel gap. You may find that having the gap shape angled may actually improve the level of comfort and back support you get from your corsets.
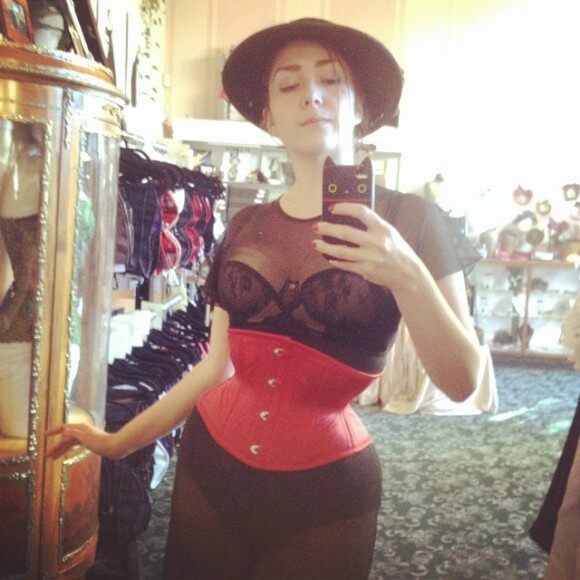
Dark Garden bespoke Waspie being broken in. Via @popantique on Instagram.
Breaking in a corset
Sometimes when fitting a corset, I'll see that there's a bit of looseness through the ribs and hips, but the gap is correspondingly a bit wider. If I'm fitting a corset for a sale, then I'll know that once the corset is properly broken in (much the way a pair of shoes breaks in), it will lay well against the body with an appropriate gap size. Diagonal dimpling in the fabric also relaxes as the fabric molds around the body.
If your eyes haven't glazed over yet, next week I will go into greater depth in discussing corset fit, specifically regarding the bust and vertical measurements. Do you have any corset fit questions you'd like to see addressed?