Pasties, Fringe and Rhinestones: How to Make Burlesque-Inspired Lingerie
We’re taking a break from using patterns and machines, in favor of hand sewing and rhinestones! In Pasties, Fringe and Rhinestones: DIY Burlesque-Inspired Lingerie you will not be using any specific patterns, but rather working with limited materials to create showgirl lingerie.
The first gig I had working on costuming was for Philadelphia’s Cabaret Administration, which holds a special place in my heart. Not only did I learn a tremendous amount about burlesque, I also picked up a ton of tricks and tips related to sewing and craftwork. Burlesque is very DIY: you can buy gorgeous pasties and elaborate costumes, but many of the performers don’t have the kind of money that burlesque superstars like Dita Von Teese or Roxy D’Lite have. The performers I have met and worked with create their own costumes, which inform the stunning performances they write and choreograph. Inspired by the DIY nature of burlesque, I sought to create some basic attire using materials that are associated with the craft. Pasties, Fringe and Rhinestones uses just a few basic materials to create Burlesque-themed lingerie.
Materials Needed:
- An old bra that you will not mind stitching layers of fringe upon.
- An old suspender belt that you won’t mind adding fringe and rhinestones to.
- 10 yard spool of chainette fringe
- 1 marabou boa
- 1 spool of thread
- 1-2 packages of Rhinestones
- 1 sheet of felt (make sure to get a firmer felt that can hold its shape once molded)
- ¼ yard lace
- 1 package beads
- 1 bottle Gem Tac (other adhesives won’t hold up - spend the extra money on this)
- Small paintbrush or toothpick
- Hot Glue Gun and 1 package of glue sticks
- Scissors and snips (snips are tiny scissors, very useful for tight curves.)
- Marker, pencil, or tailors chalk
- Hand sewing needle
- Tapestry needle
- Crayons (optional)
- Tweezers (optional)
Vocabulary:
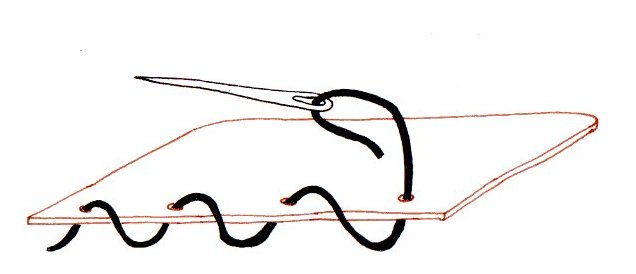
Whip Stitch – A type of stitch that goes around the two pieces of fabric. See below.
A few notes before we start:
- This column is set up like course curriculum. During the last few months I have been teaching some basics that will not be going over in future posts. If you find yourself lost, please feel free to look back at Where to Start , Loungewear Part 1 and Part 2 , Robes, or Slips.
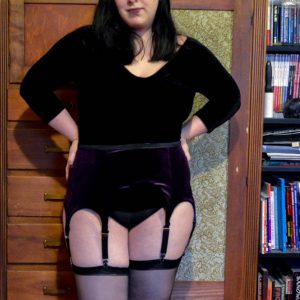
- Due to body dysmorphia and lack of an assistant on this project, I opted to take the final pictures on a mannequin rather than myself. While they don't show you what they'll look like on an actual body, you still get the idea.
- In order to wear your pasties, you will need fashion tape, carpet tape, or spirit gum.
- If you'd like to plan a burlesque routine, opt for a four-strap suspender belt instead of a six-strap.
- To give you an idea of how well Gem Tac holds up, I wore the suspender belt that I created for this tutorial for a full day at my office and none of the gems fell off. PAY THE EXTRA COUPLE OF BUCKS FOR THIS ADHESIVE!!! You seriously won't regret it.
Project 8: Pasties
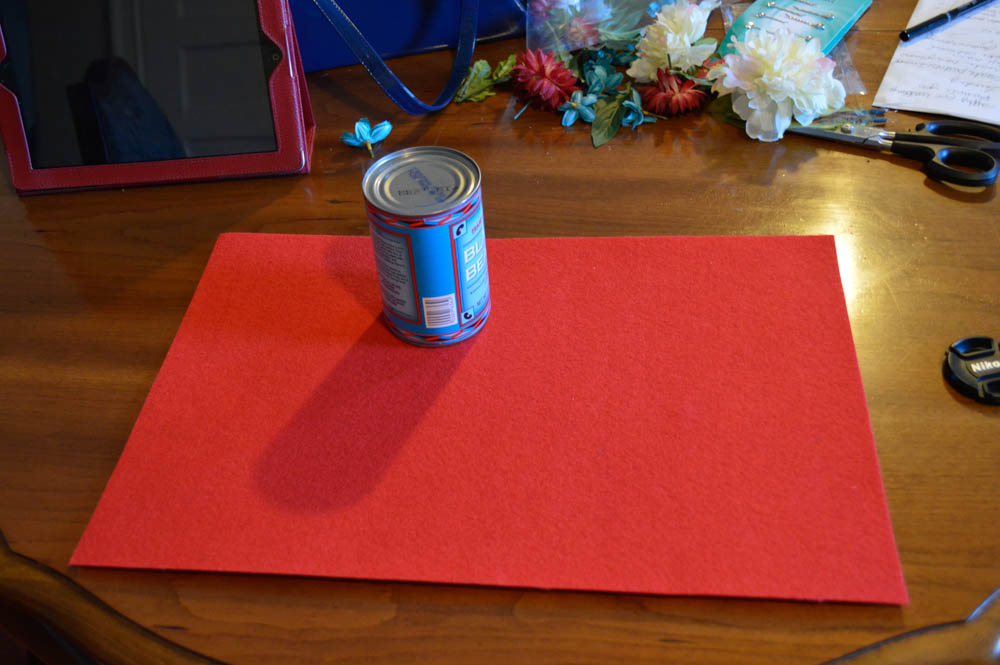
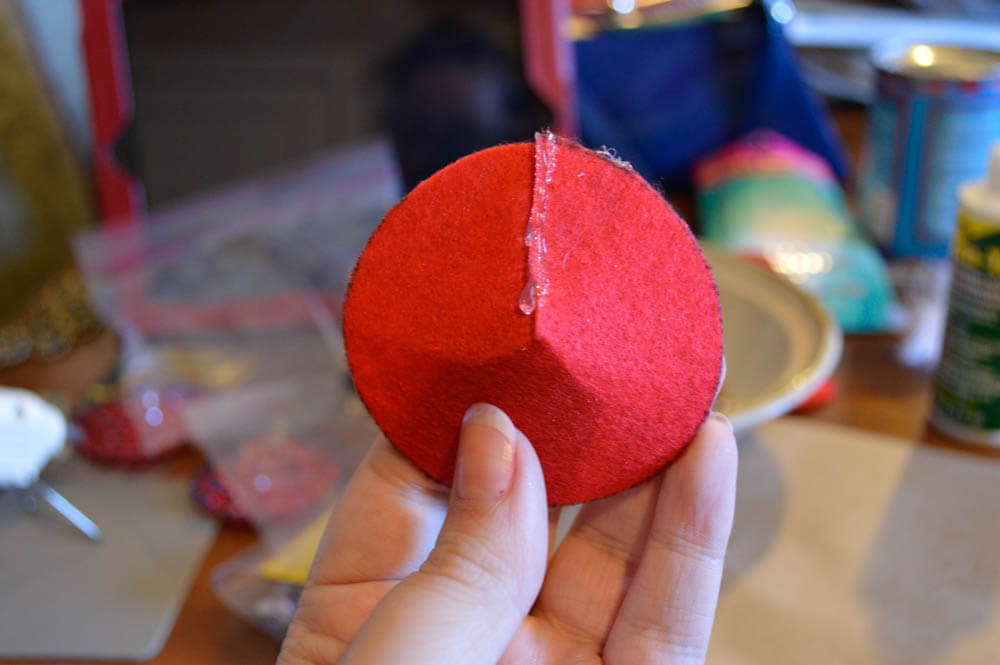
1) Before starting you will want to either create a template, or find a circular object that you can trace. I used a can because my nipples are on the larger side.

2) Trace your template on the felt at least twice to create the base for your pasties. I will show you three variations, but make how ever many your heart desires!
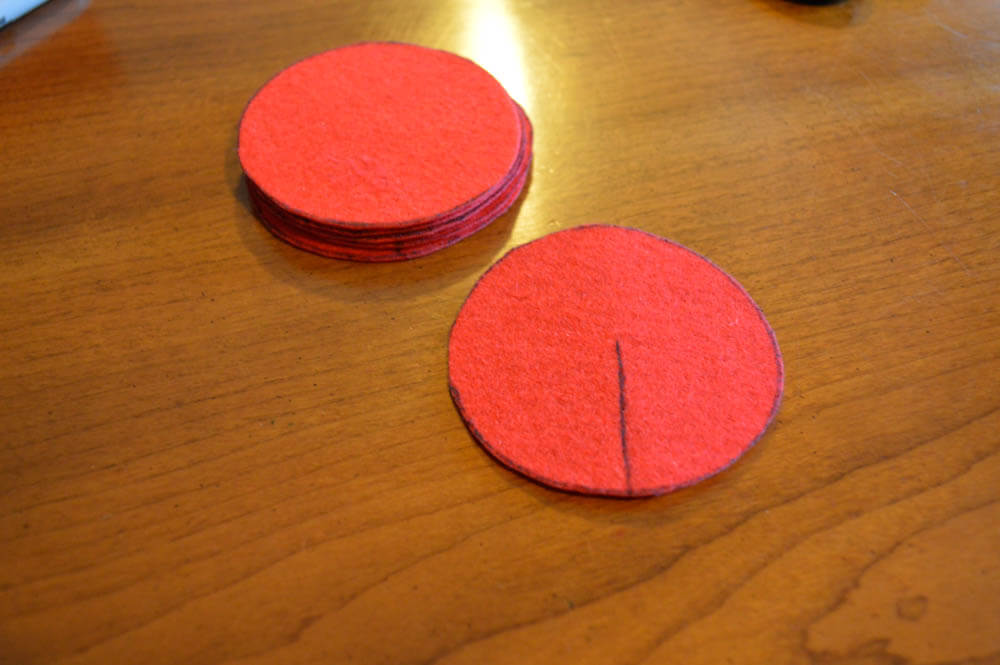
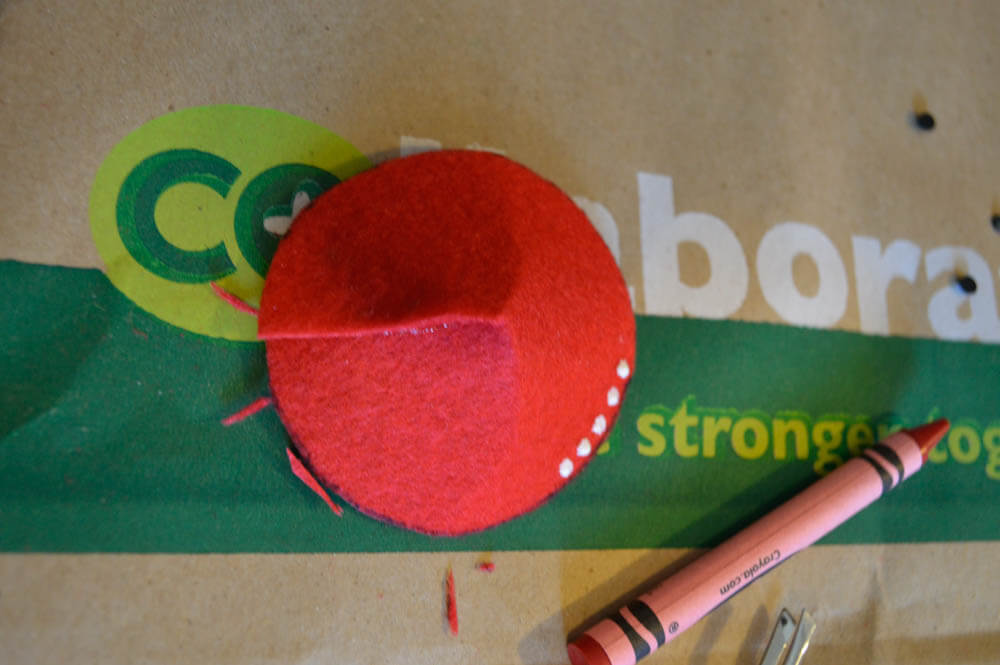
3) Starting from the center of each pasty, draw a line that continues to the edge of the felt. You will be cutting along this line in order to mold the pasty, so try to make sure the lines are symmetrical.
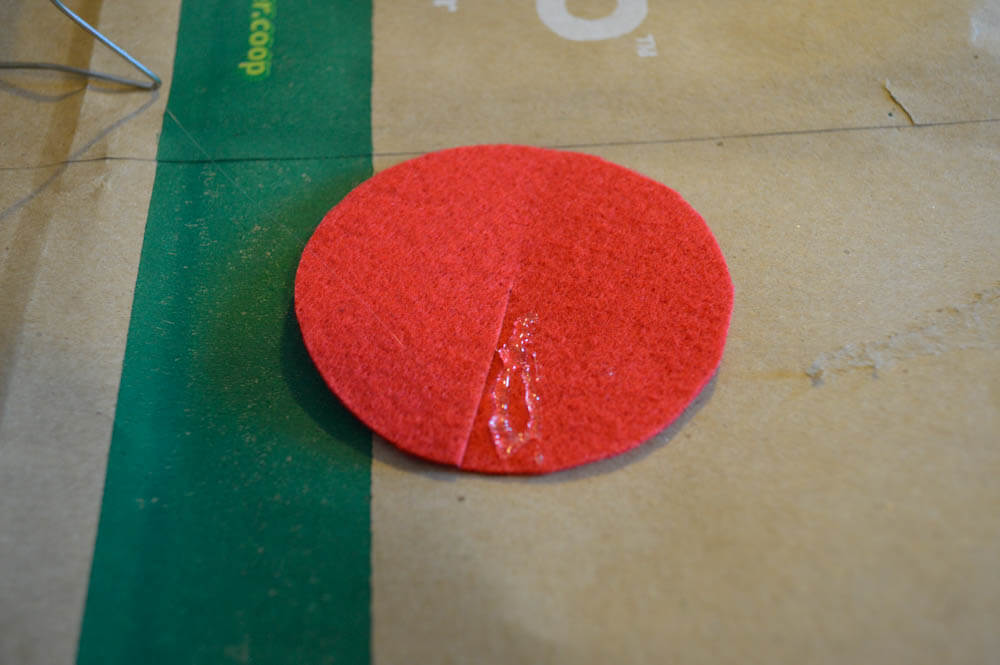
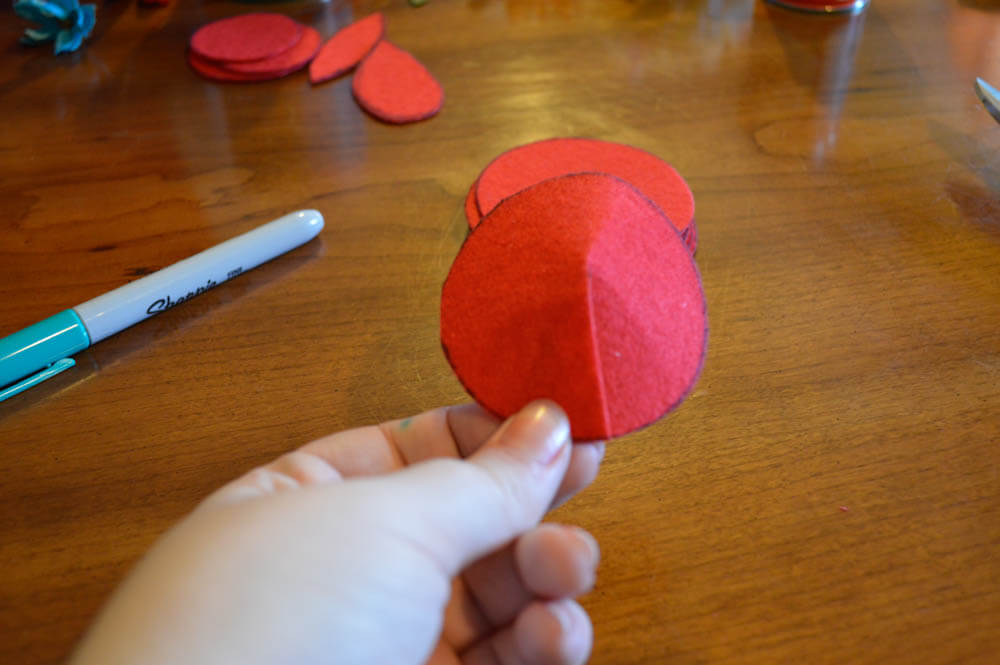
4) Squeeze out a little bit of the hot glue onto one side of the cut line, then mold the pasty by overlapping the two sides.
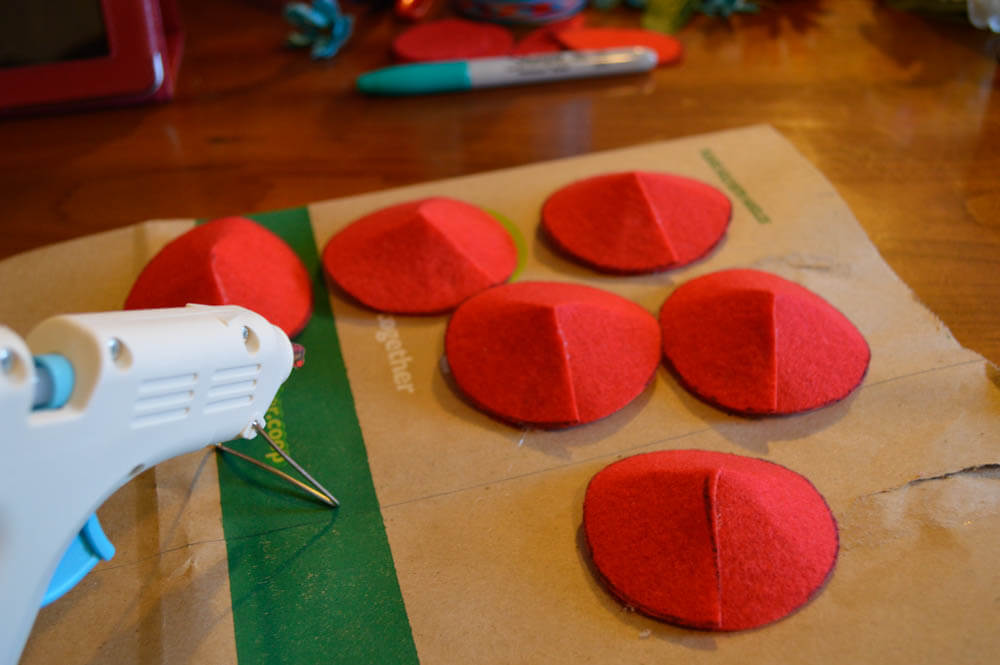
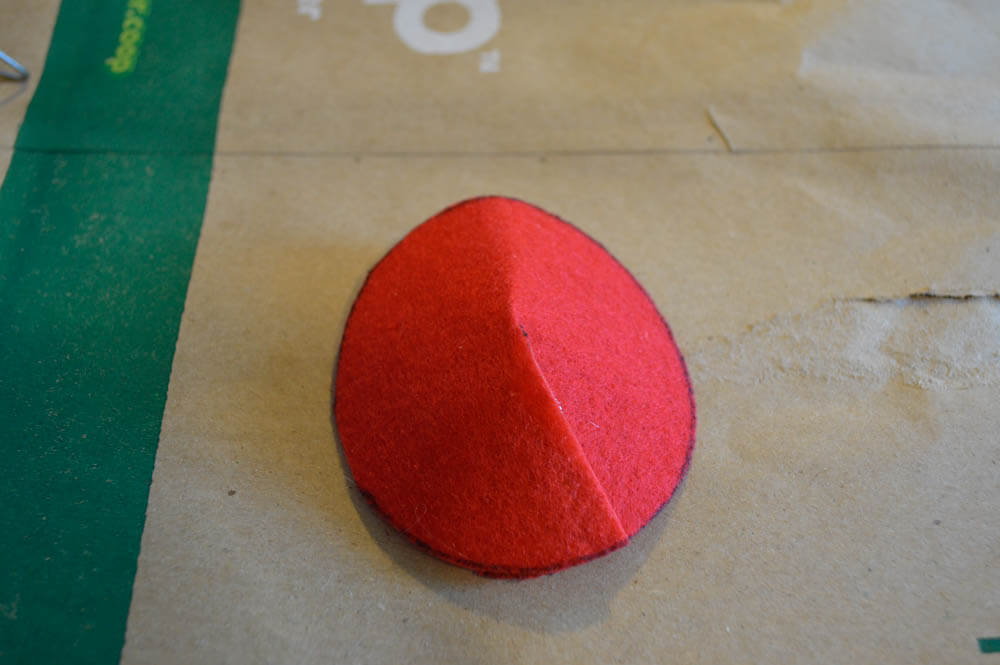
5) Once you're finished, your pasties should look like this.
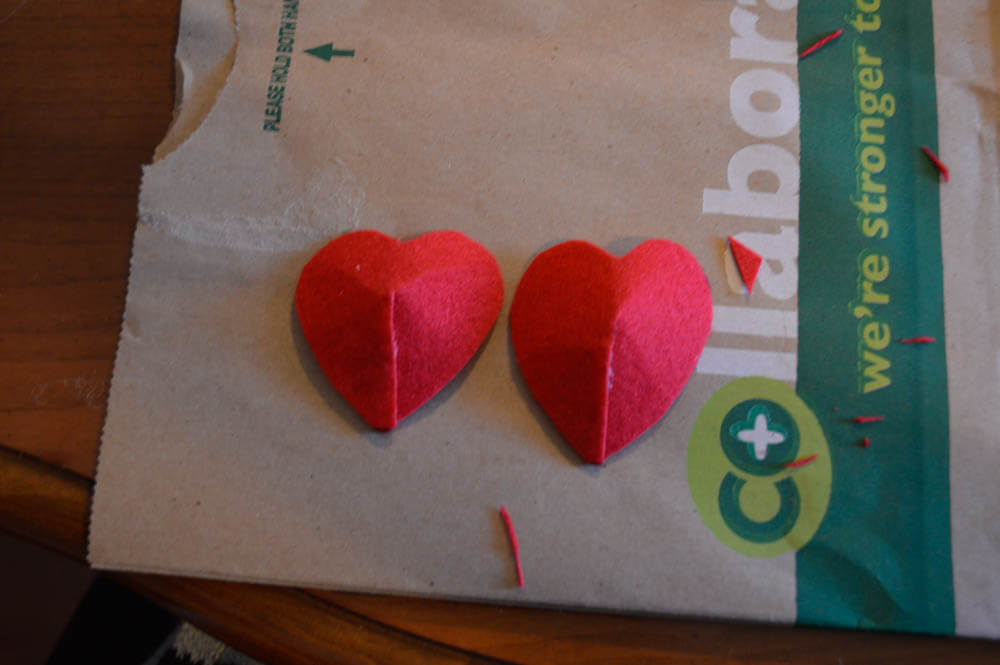
6) At this point you can shape your pasties how ever you'd like. Common themes include hearts and stars.
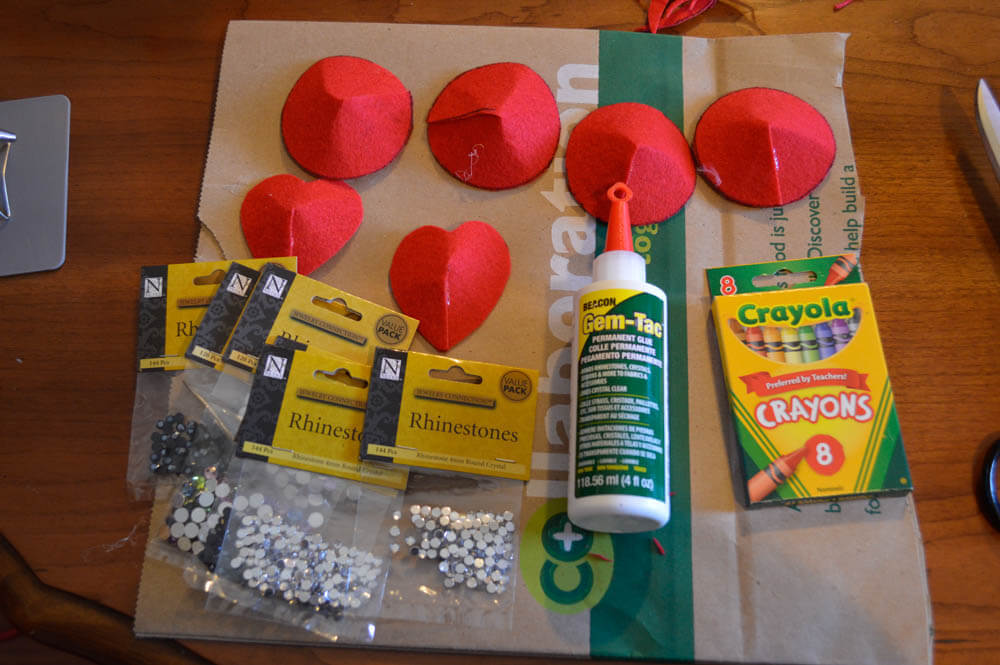
7) Now it's time to have fun! Pull out your rhinestones, Gem Tac, and crayons or tweezers.
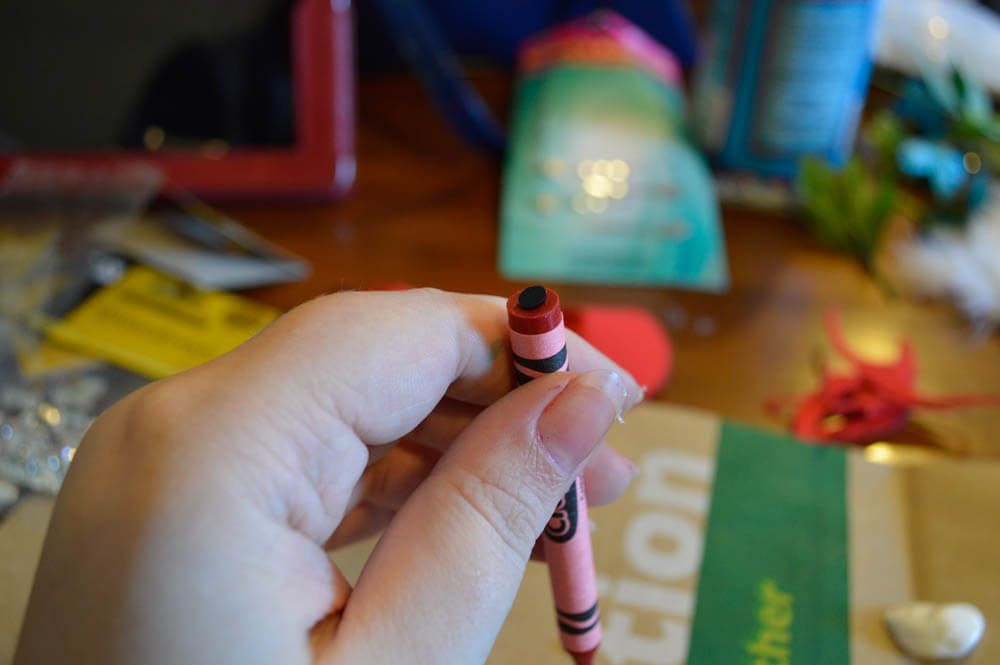
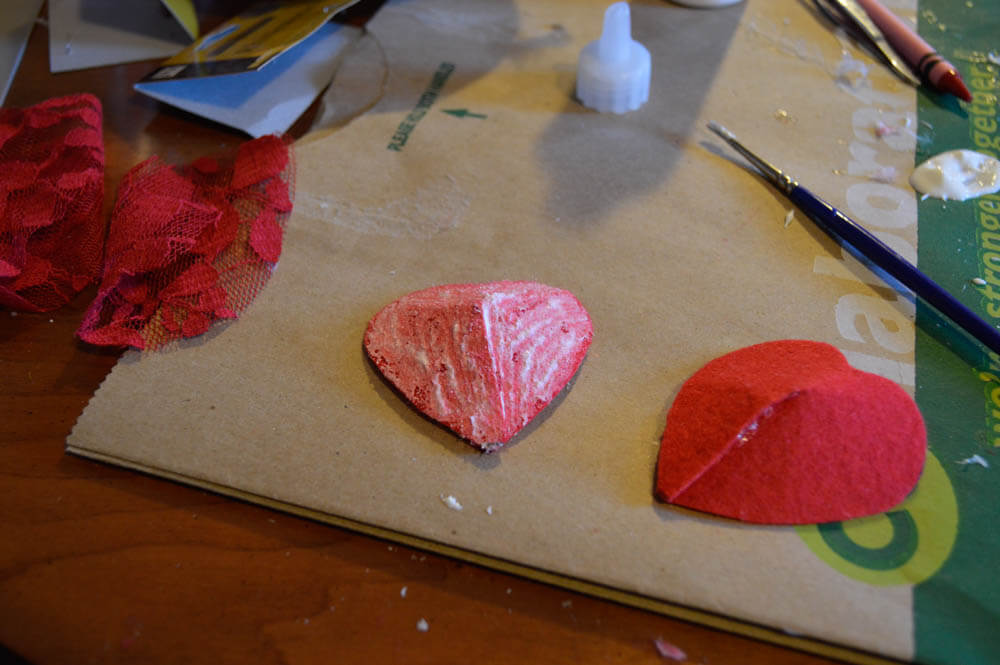
8) If you're wondering why you need crayons, it is because they work really nicely for picking up the rhinestones. Use the flat side of the crayon (as shown) to hold and firmly press rhinestone to the pasty, and it should stick.
9) Using your paint brush, dab a few dots of Gem Tac on the pasty. Don't place too many dabs of glue or they will dry before you can place your rhinestones.
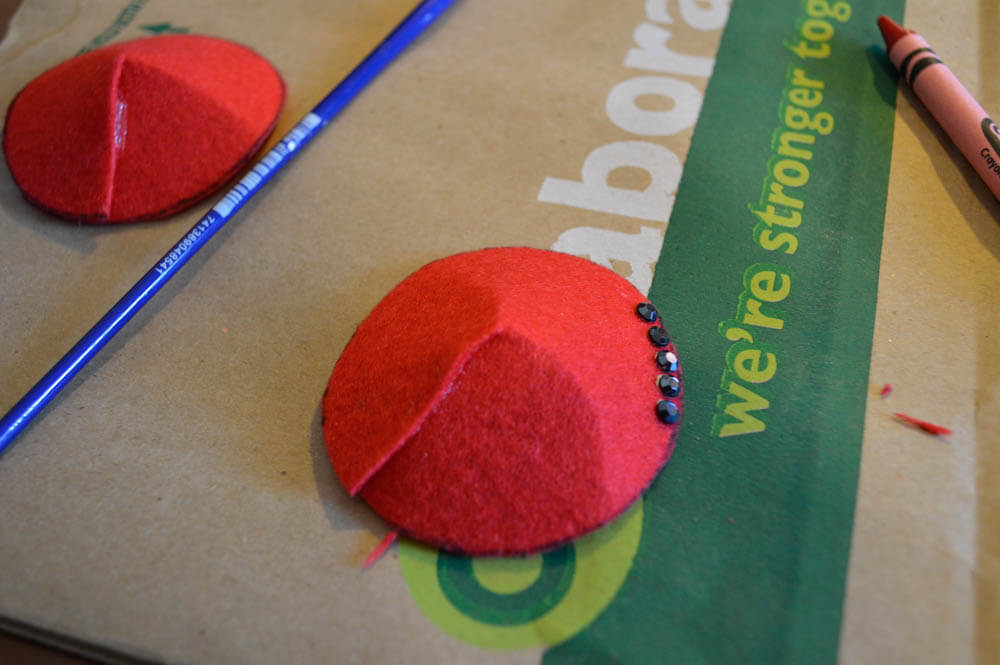
10) Place your rhinestones on top of the glue using your crayons or tweezers.
11) Repeat the process as many times as needed.
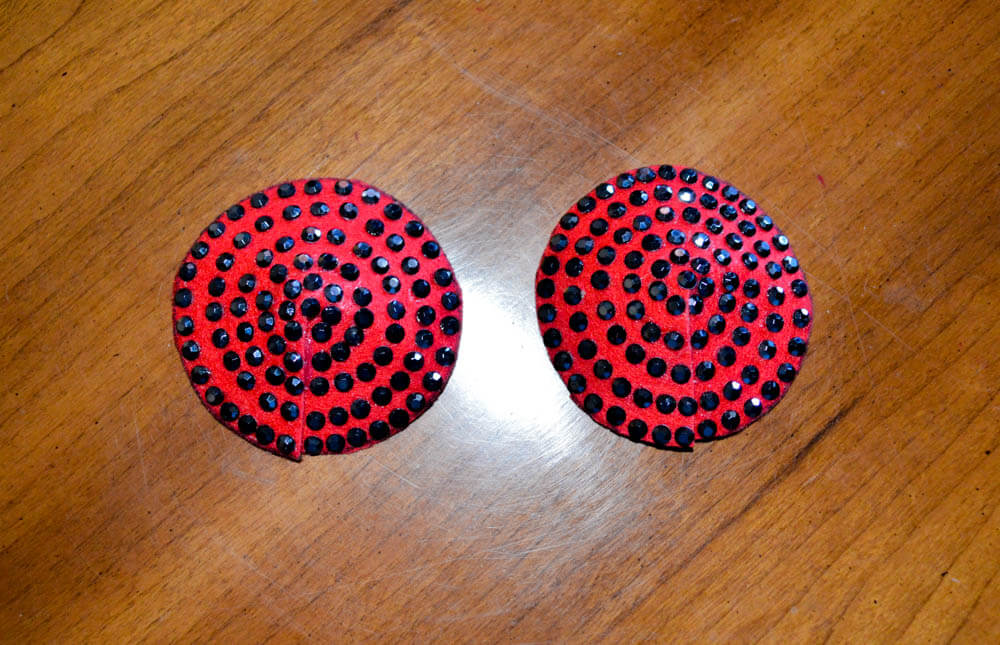
12) You can either fill up the pasty or create a design, whatever suits you.
Variation 1: Feathers
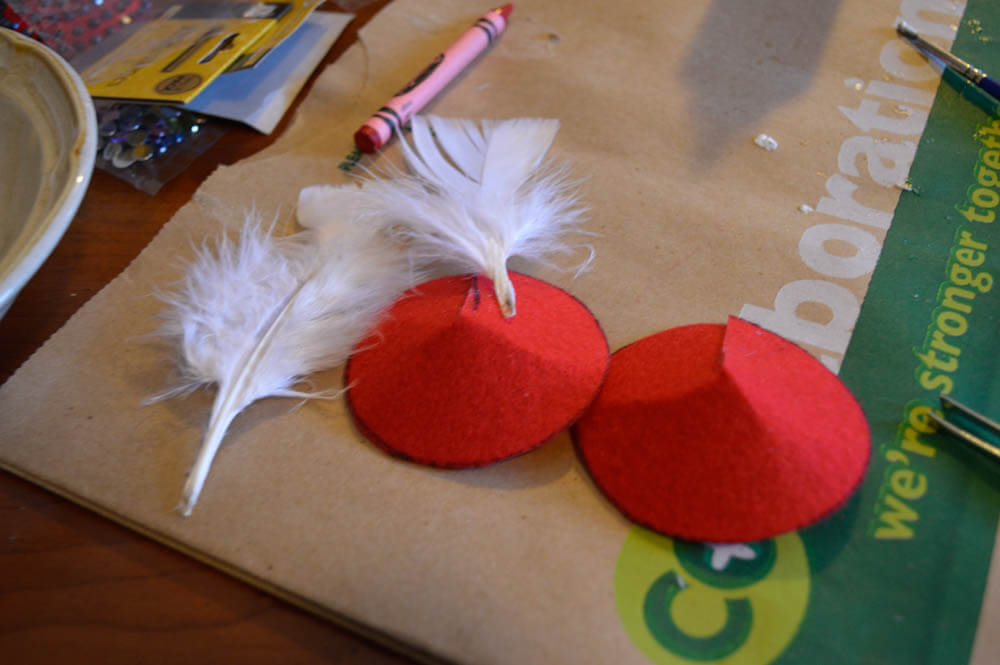
1) Run a thin line of hot glue along the seam, and place a feather on top of the glue.
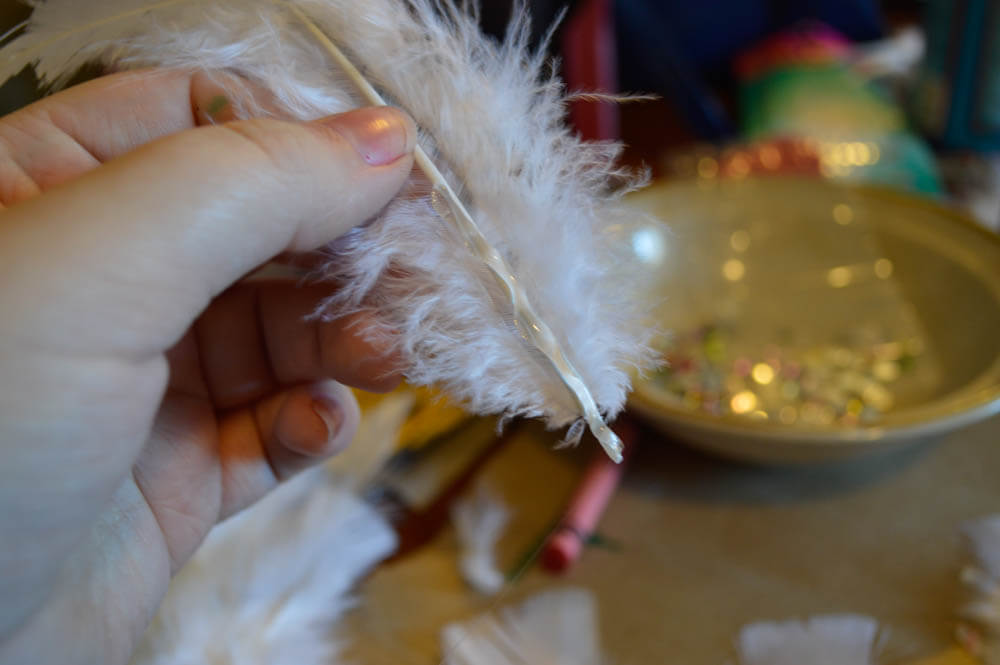
2) For the rest of the feathers you will want to place the hot glue along the stem of the feather, let cool for 10 seconds, then place on the pasty.
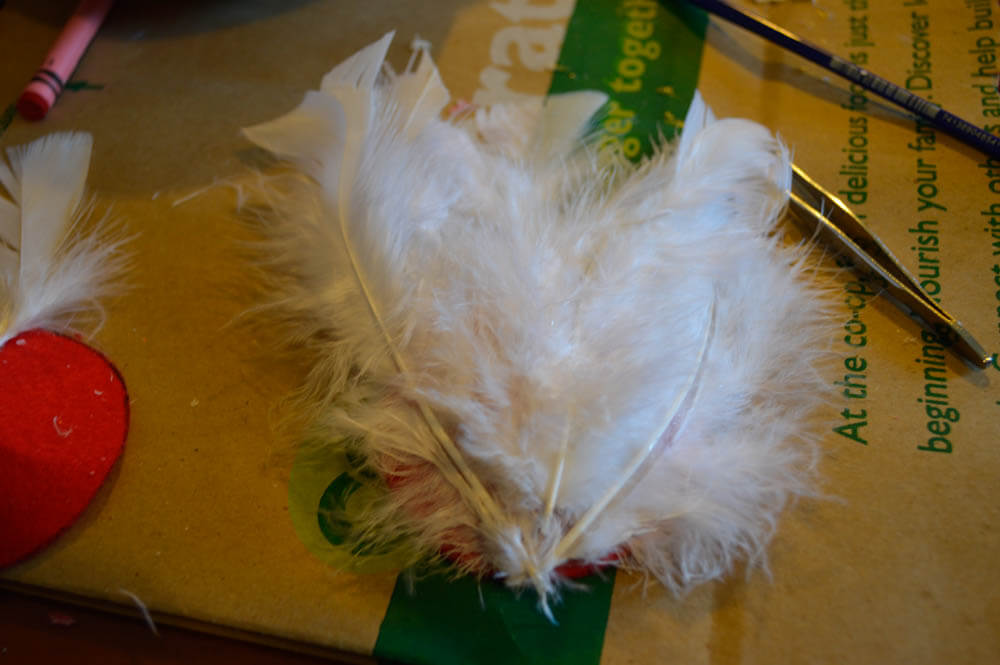
3) Continue this until you have covered the pasty.
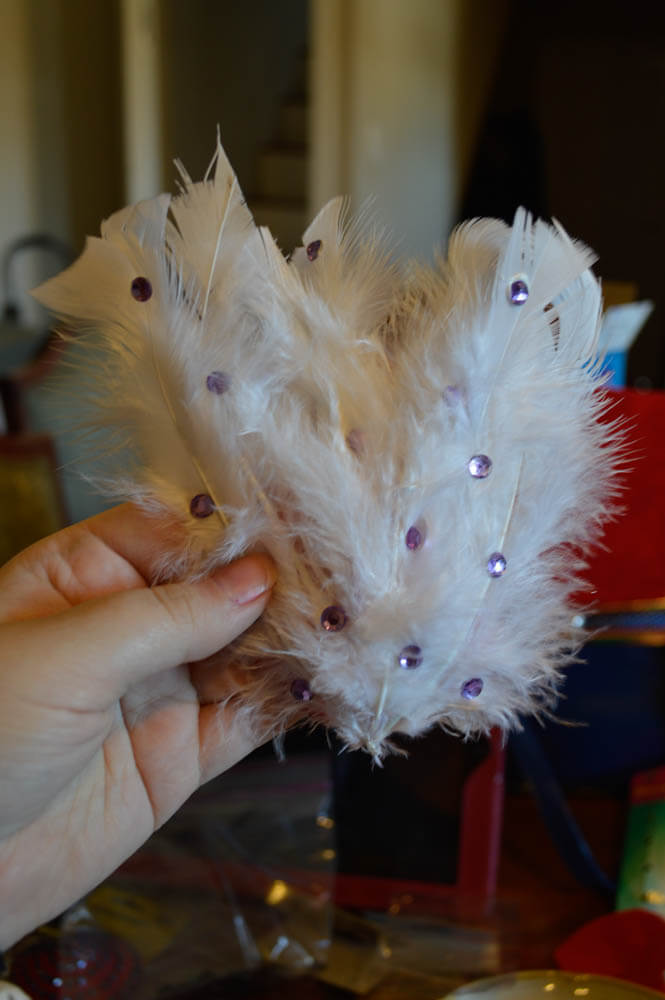
4) Optional: Use Gem Tac to place a few rhinestones for a little added dazzle.

5) Admire the feathered glory!
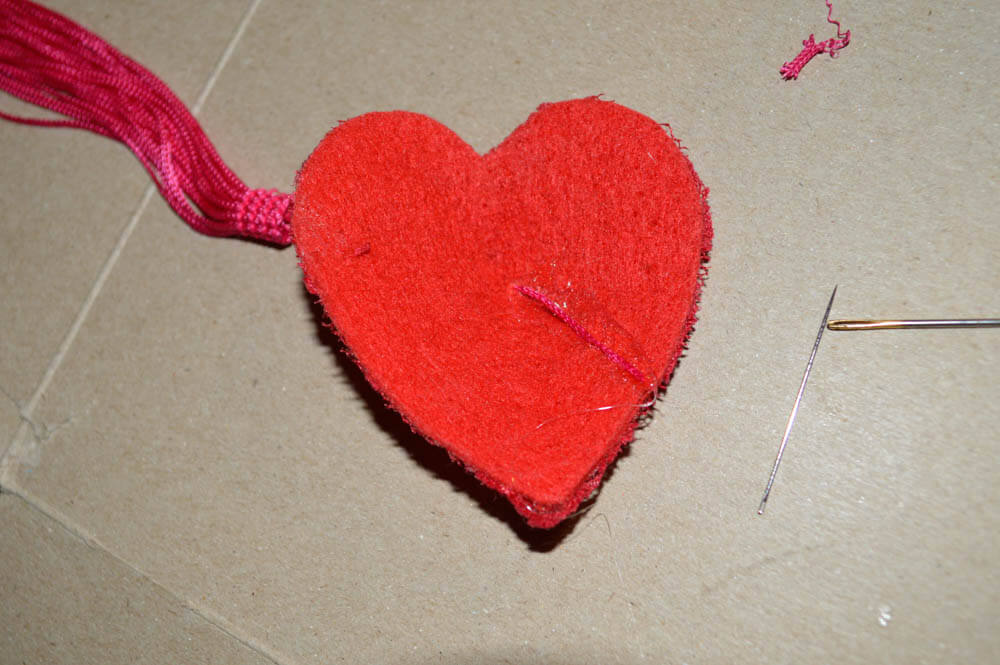
Alteration 2: Lace Overlay and Tassel
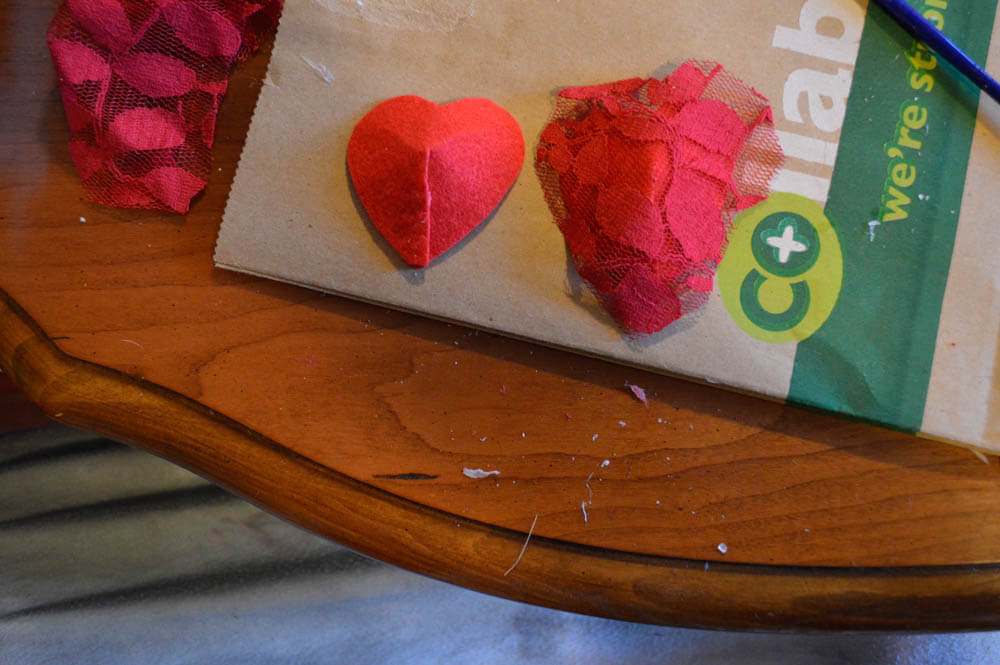
1) Cut out a piece of lace that is large enough to cover your pasty.
2) Place Gem Tac all over the front of the pasty.
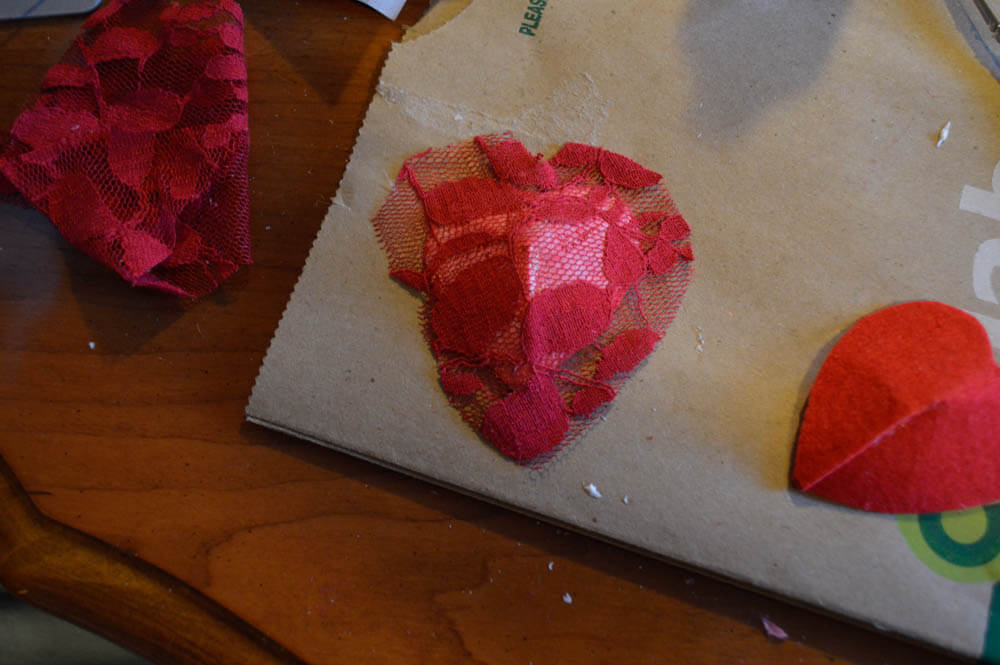
3) Press the lace down and let dry. Once dry, trim the edges.

4) Cut two 1" pieces of fringe. Pull the third string aside. You will later use this string to attach the tassel to the pasty.
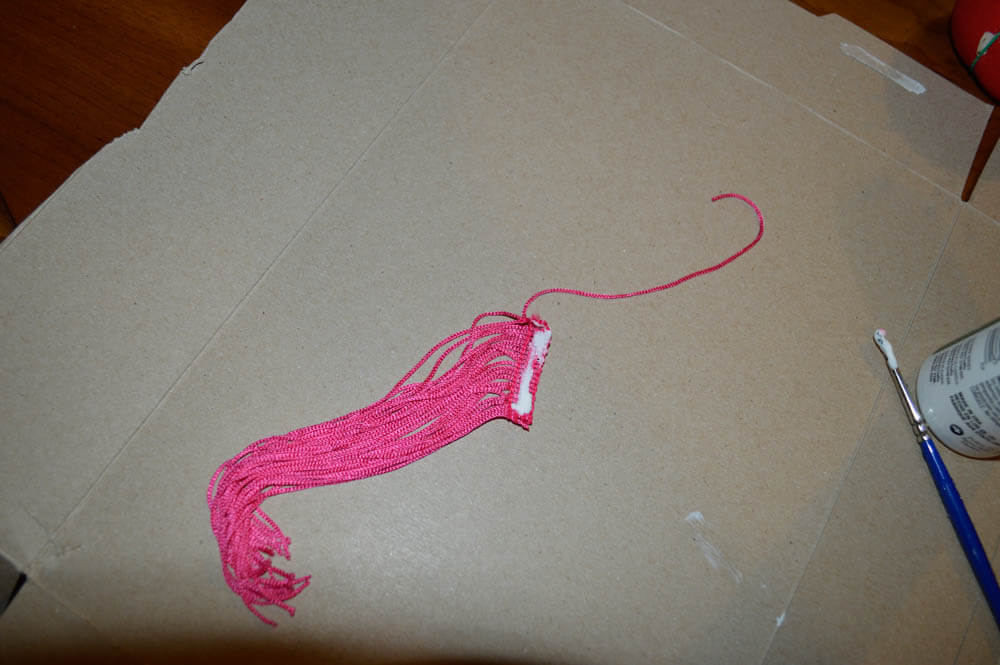
5) Place Gem Tac on the top of the fringe.
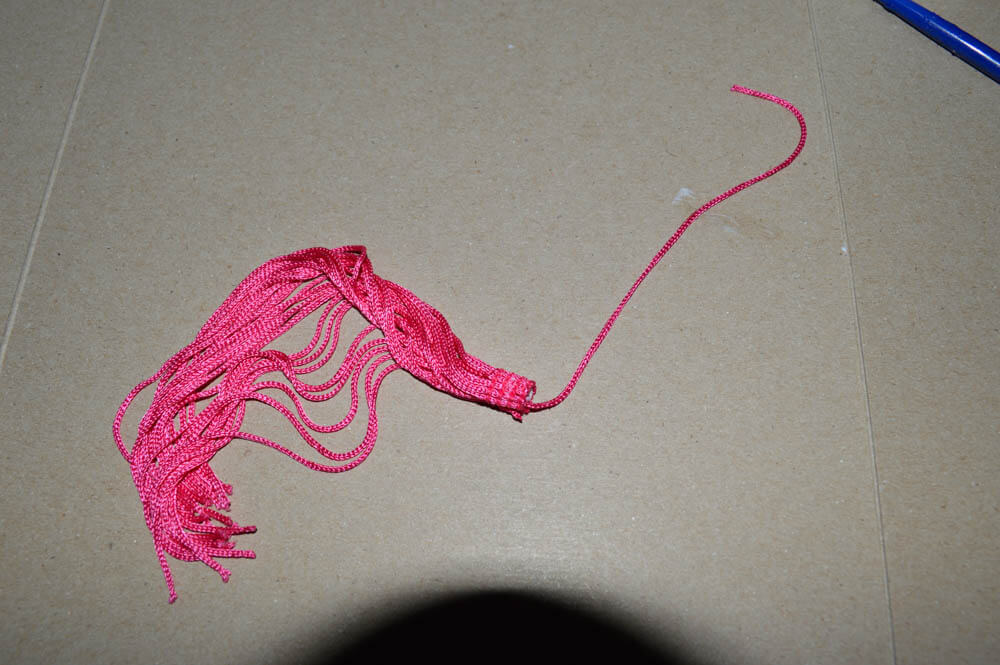
6) Roll the tassel up along the top, but make sure to keep the third string separated so it sticks out of the top.
7) Let dry.

8) If desired use Gem Tac and rhinestones to embellish.

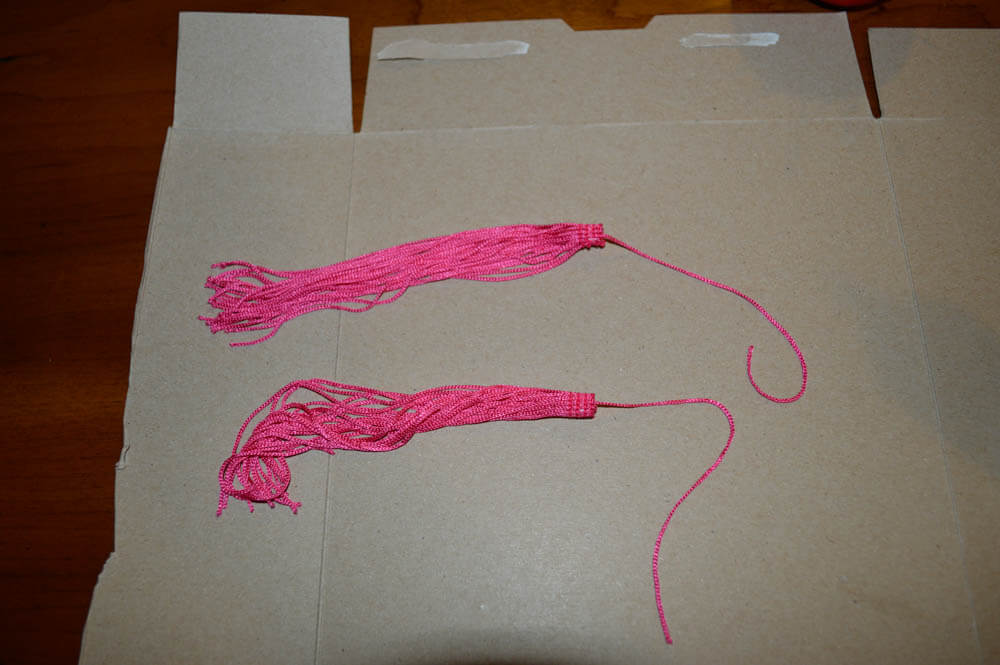
9) Now you'll make use of the third string you set aside earlier. Thread a few beads through the string. The beads will weigh down the tassel for optimal twirl.

10) Thread your tassel through the tapestry needle. Use the tapestry needle to poke through the center of the pasty.

11) Make sure you pull enough through to glue to the pasty.
12) Place the threaded string in the overlapping area. Cut any excess away. Use hot glue to set in place.

13) Wait for the glue to cool and admire!
Skills and techniques learned from this project:
- Shaping felt to make the base for pasties
- Using Gem Tac and rhinestones to embellish
- Using feathers and hot glue to embellish
- How to create a lace overlay for pasties
- How to add tassels to your pasties
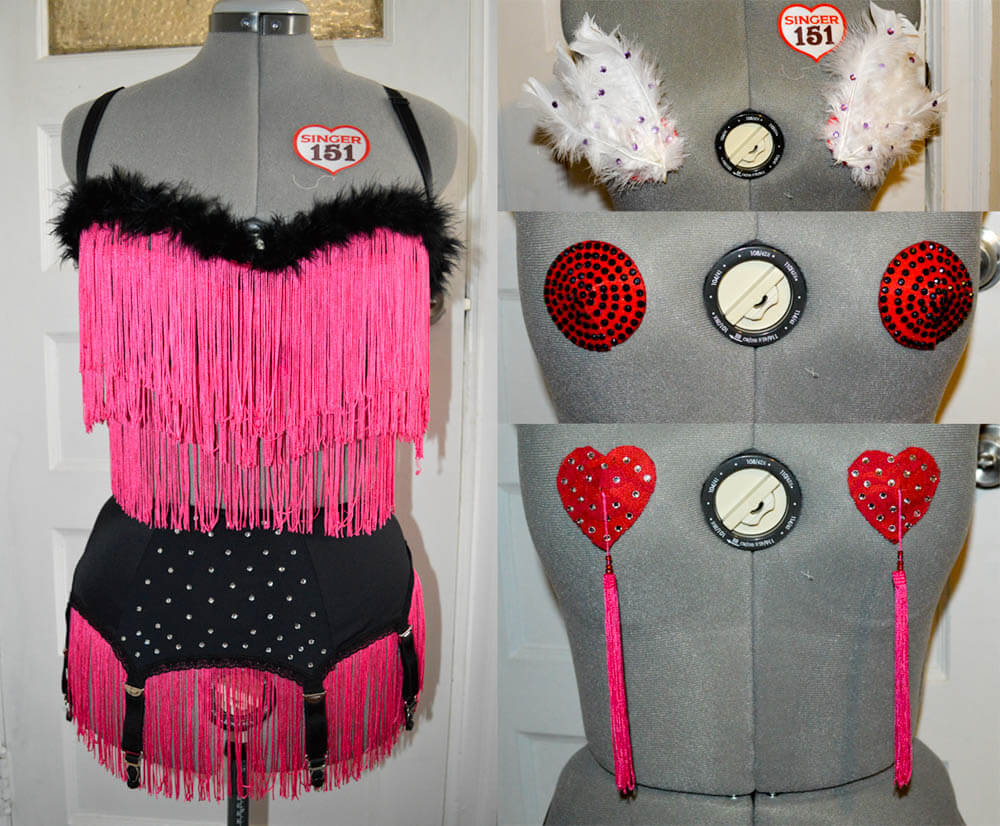
Project 9: Fringe Bra and Belt
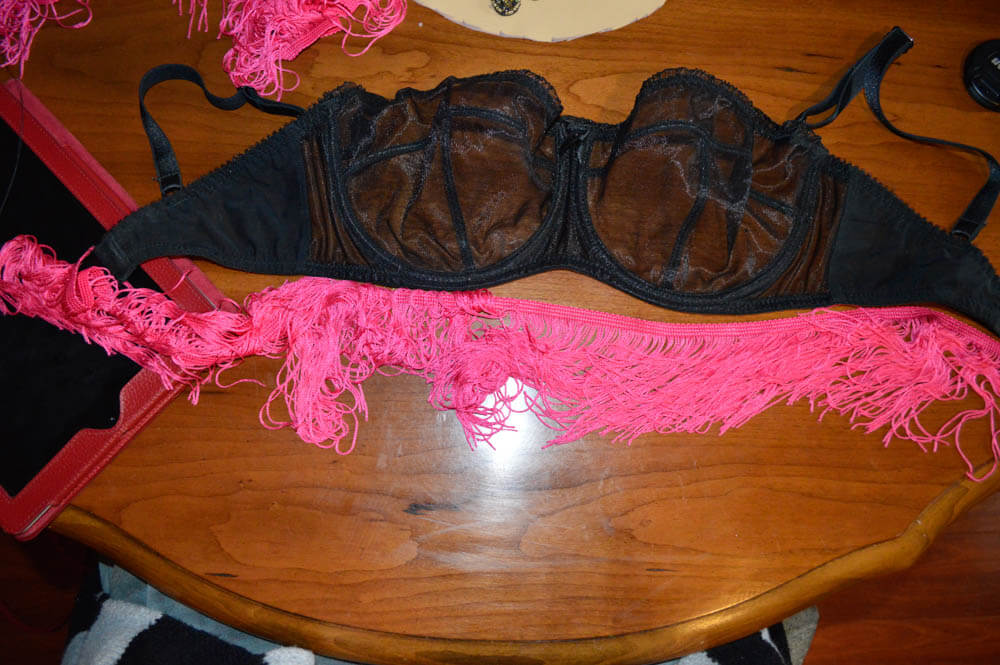
1) Measure your under bust and add 1/2". Cut a piece of fringe to match this measurement.

2) Fold the edge of the fringe to encase any raw threads. Stitch in place.
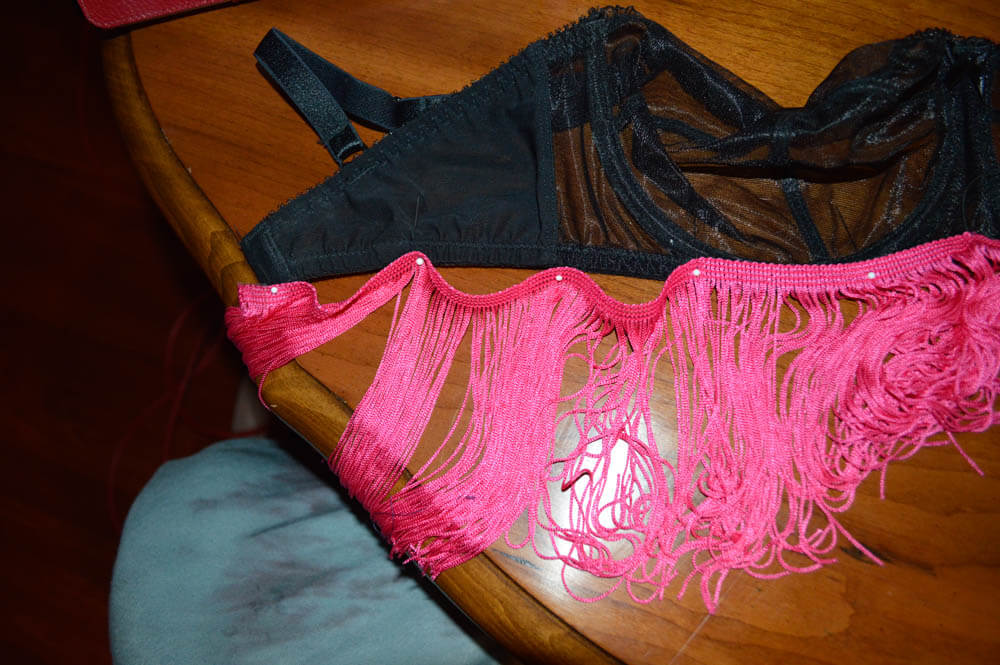

3) Pin the fringe to the bottom edge of your brassiere. Since your bra will most likely have a bit of stretch to it, but the fringe will not, stretch out the wings as you pin. Carefully try on the bra and make any adjustments as necessary.
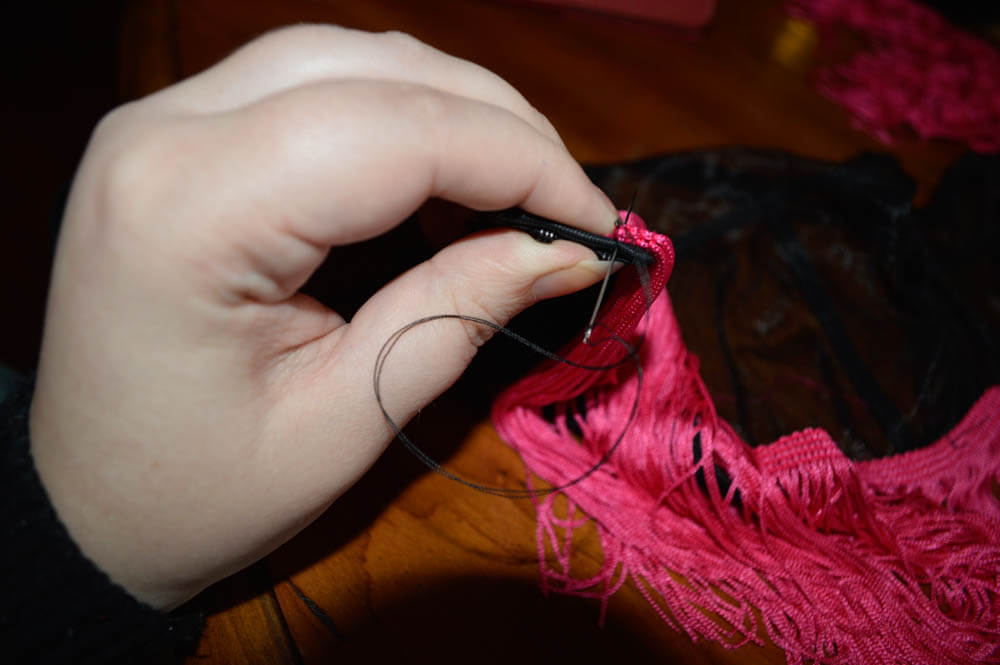
4) Start by stitching the ends in place. Make sure to leave enough room to be able to clasp the hook and eyes. Once the edges are stitched in place, tack wherever you have placed a pin.

5) Continue on to the next row of fringe. This row will be stitched across the cups of the bra. If the cups do not stretch, you can use a whip stitch; if they do, stick with the tacking method.
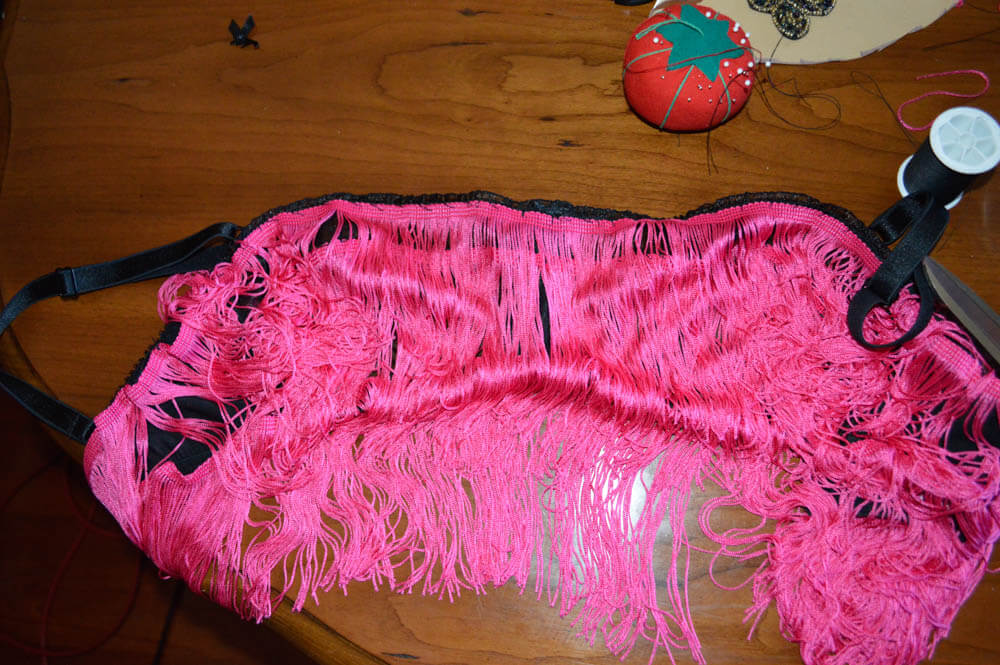
6) Move on to the top row of fringe, which will cover the entire top of the brasserie.
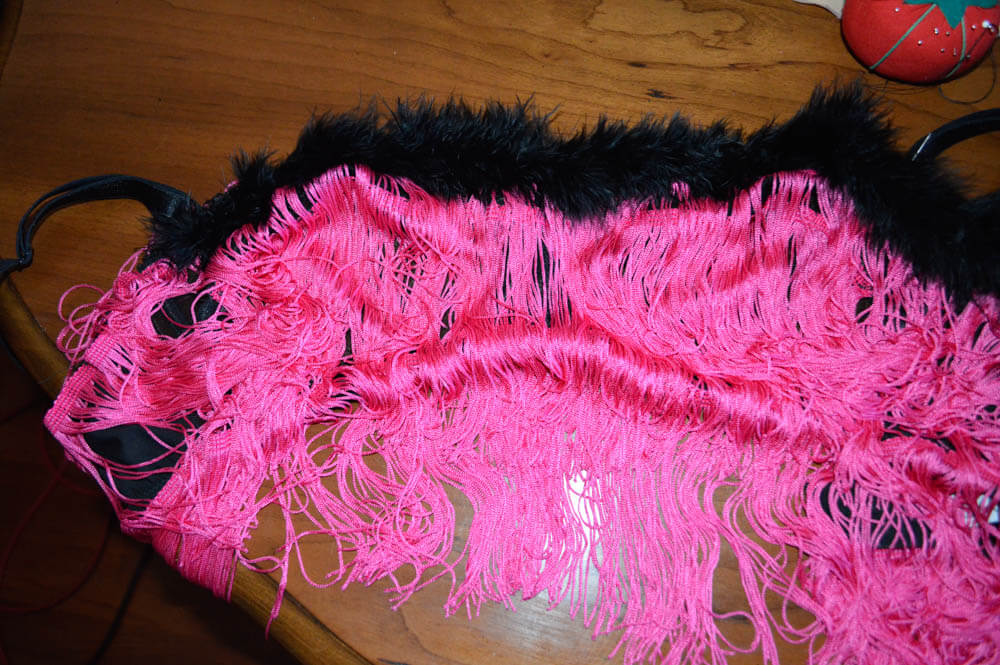
9) Lastly, cut a piece of the marabou boa that will sit across the top of the cups. Whip stitch in place.
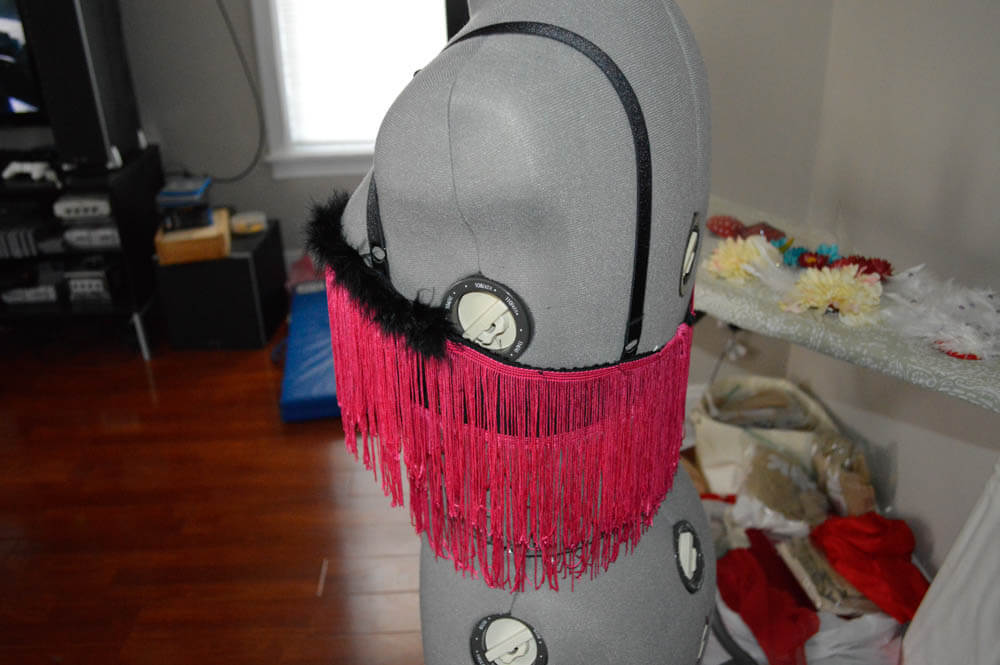
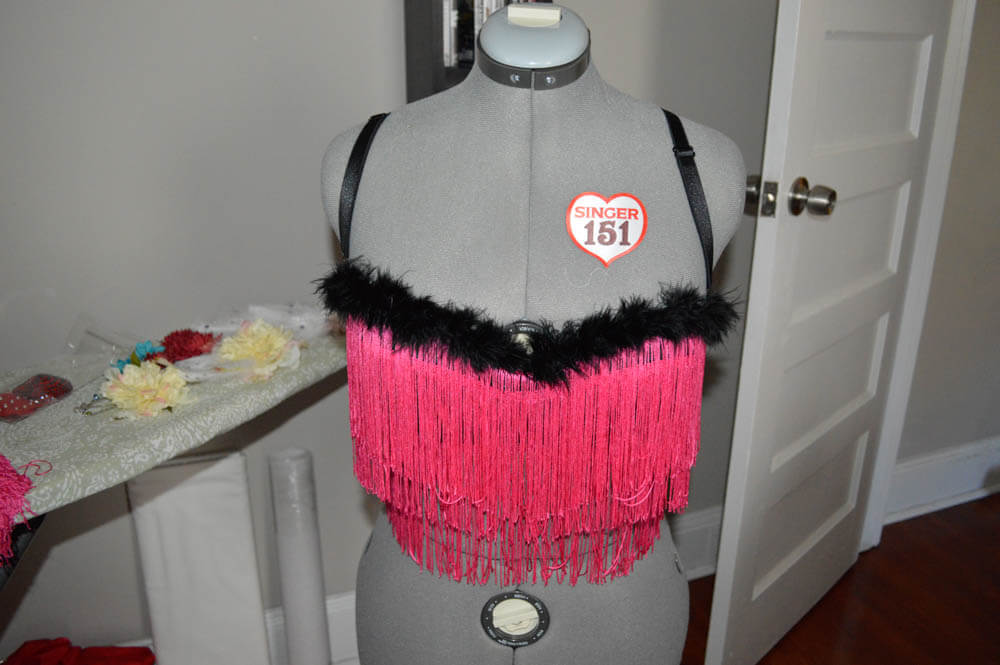
10) As you can see, the fringe will lay flat while wearing the bra.
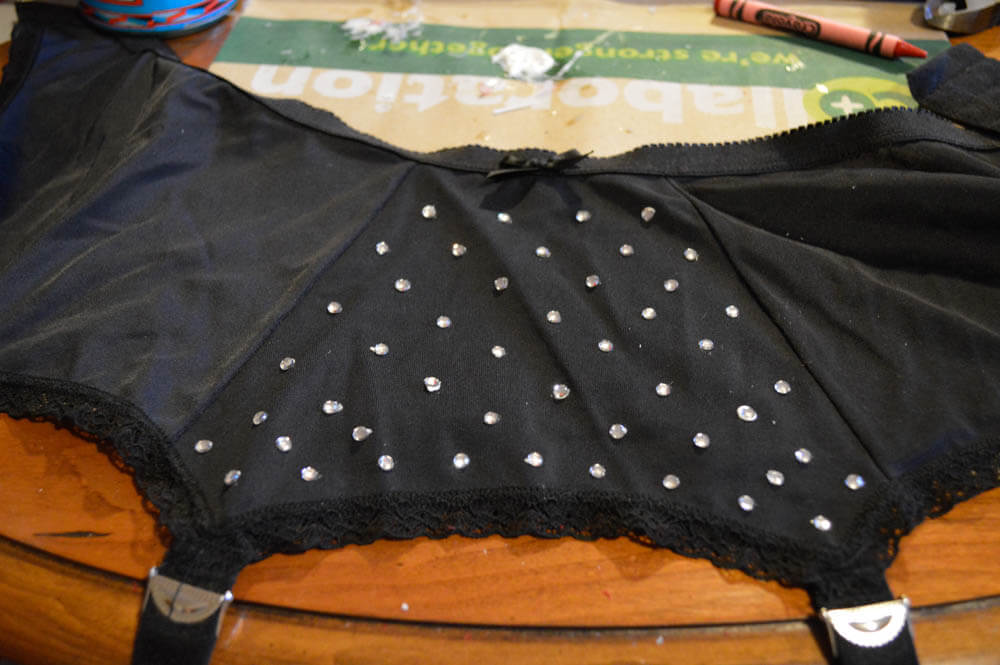
11) Using Gem Tac and rhinestones, add a little glitz to your suspender belt.

12) Using the same method that we used for pinning the bra, tack the fringe to the suspender belt.
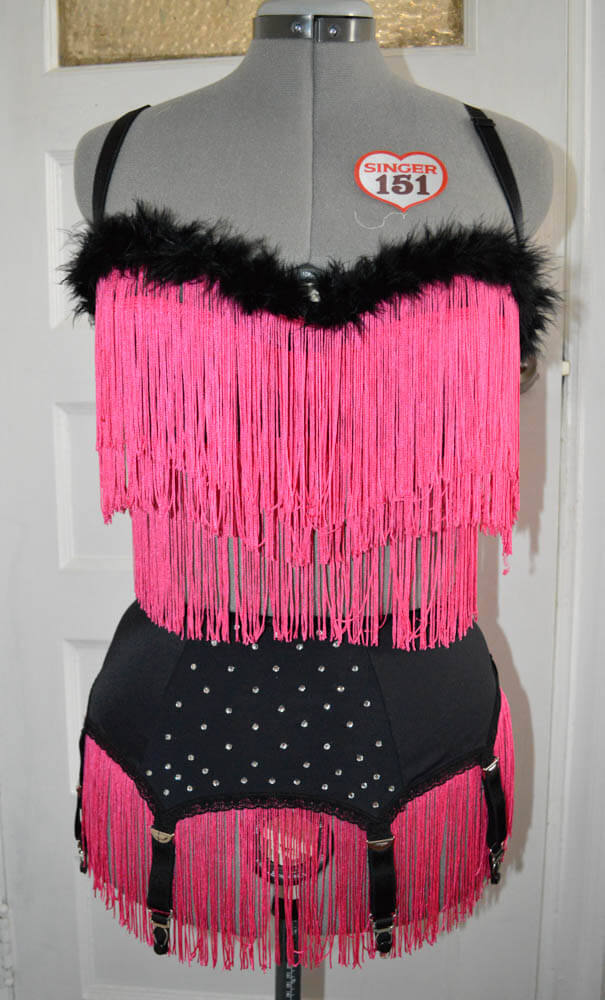
13) Try the whole set on and shimmy about!
Skills and techniques learned from this project:
- How to spruce up pre-made lingerie in order to get a burlesque look.
- Using hand sewing to embellish lingerie
Next time:
More burlesque goodies! Next week I will go over frame bras, shimmy belts and fans.
Are there any particular styles or designs you would like to try out? Have you tried making anything yet? If so, how did it go? As always your feedback is welcome and appreciated. Please feel free to leave any comments, suggestions or requests below!